Unique DIY Wedding Invitation Ideas
Unique DIY wedding invitation ideas can transform your wedding experience, making it truly personal and memorable without breaking the bank. Creating your own invitations not only adds a personal touch but also allows you to let your creativity shine. In this article, I share a range of ideas to get you started, along with practical steps, tips, and solutions to common challenges many DIY enthusiasts face. Plus, if you’re planning your entire wedding, check out my wedding planning guide available at www.weddingdayplan.com for more inspiration.
Innovative Materials for DIY Wedding Invitations
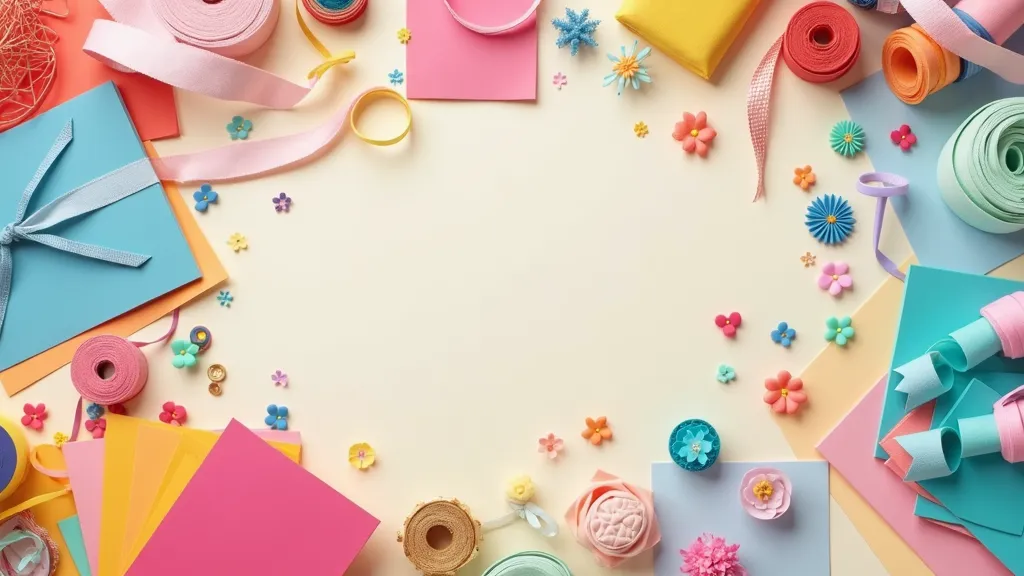
The foundation of any unique DIY project is the materials you choose. When it comes to wedding invitations, there are many innovative options beyond traditional paper. Experimenting with different materials can add texture, color, and personality to your invitations. Many couples are exploring materials such as translucent vellum, recycled paper, and even organic elements like pressed flowers. Choosing the right supplies can make your invites feel artisanal and one-of-a-kind.
Using materials that match your wedding theme and colors can amplify the overall aesthetic. For instance, if your wedding has a rustic vibe, using Kraft paper paired with natural fibers creates an inviting look. On the other hand, for a more modern celebration, metallic card stock or acrylic can bring a sleek finish to your invitation. Experiment with layering different materials, mixing textures, and even incorporating elements like lace or fabric. Each additional touch can truly set your invitation apart and give it that extra level of detail.
Step-by-Step Guide to Crafting Personalized Invitations
Before jumping into your project, it helps to have a plan. Mapping out your invitation design step by step can streamline the process and keep you organized. Here’s a straightforward guide to crafting your own personalized invitations:
Conceptualize Your Design: Jot down ideas that reflect your wedding theme, colors, and overall vibe. Think about whether you want a classic design, a vintage feel, or something truly modern.
Gather Your Materials: Based on your concept, collect all necessary supplies. This could include various types of paper, stamps, embellishments like ribbons or buttons, adhesives, and other crafting tools.
Create a Mock-Up: Before producing a batch, craft a sample invitation. This draft version allows you to experiment with layouts, fonts, and color schemes. A mock-up helps you see how different elements interact before final production.
Print and Assemble: Once you’re satisfied with your design, print your invitations using a quality printer. If you’re using craft techniques such as hand-painting or calligraphy, complete these steps after printing, then carefully assemble your invitations.
Final Touches: Now is the time for the details. Add any embellishments, unique stamps, or handmade elements that will make your invitations stand out. Consider including a small envelope insert or a personalized note. Each additional element adds charm and a sense of uniqueness to your work.
This methodical approach ensures that your DIY wedding invitations not only look professional but also capture the true essence of your celebration. Taking the time to plan and execute every step makes the finished product all the more special.
Common Challenges and Creative Solutions
Every DIY project comes with its challenges, and wedding invitations are no exception. Here are some common issues you might encounter and practical solutions to overcome them:
Inconsistent Quality: When making invitations by hand, it can be hard to achieve uniformity. To address this, start with a detailed mock-up and consider using templates when possible. This approach provides a guide for each invitation you create, ensuring consistency throughout your project.
Time Management: DIY projects often take more time than expected. Planning your workflow is very important. Set aside dedicated hours for crafting and break the project into smaller tasks that you can tackle day by day. This structured method helps prevent feeling overwhelmed by the overall scale of the project.
Limited Resources: Not having access to professional tools can be a setback. However, many creative techniques can be achieved with basic tools found around the house or with inexpensive supplies from craft stores. Online tutorials often provide tips for replicating professional finishes without high-end equipment.
Creative Blocks: Sometimes inspiration runs dry. When this happens, taking a break or exploring other creative projects can help recharge your ideas. Online communities and DIY blogs are great for sparking new inspiration.
Inconsistent Quality
It’s easy to get discouraged when handmade items vary in quality. Using stencils, guides, or even a simple folder as a template can help you maintain a uniform look across all your invitations. Setting up a dedicated craft station can further promote focus and efficiency in your work.
Time Management
Large projects like wedding invitations can be extremely time-consuming. Allocate specific hours dedicated solely to your project and keep track of your progress. This measured approach makes the process less stressful and ensures you complete each step on schedule.
Limited Resources
Even if you don’t have high-end tools, you can still achieve impressive results with what you already have. Visit local craft stores for budget-friendly supplies or check online for innovative methods to repurpose everyday items. Using readily available resources can often lead to surprising and creative outcomes.
Creative Blocks
Creativity sometimes needs a breather. If you hit a wall, step away from your project for a day. Coming back with fresh eyes can help you see your design in a completely new light. Additionally, browsing wedding blogs or Pinterest boards can provide a burst of fresh ideas, sparking new energy into your creative process.
Advanced Tips for Customizing Your Invitations
Once you’ve mastered the basics of creating your DIY wedding invitations, consider exploring advanced techniques to add a personal flair. Customization brings in elements that are meaningful to you as a couple. Here are some creative tips to help you take your designs up a notch:
Try Mixed Media: Incorporate layers of different materials such as fabric, foil, or natural elements to create a tactile invitation. This approach adds depth and texture. Mixed media designs allow you to mix colors and materials in unexpected ways. It turns your invitation into a piece of art.
Get involved with 3D Elements: Designs that include three-dimensional aspects are incredibly engaging. For example, laser-cut shapes or pop-up features create tactile surprises. These techniques provide a novelty factor. They encourage guests to interact with the invitation and appreciate its unique design.
Personal Photos and Hand-Drawn Art: Including personal photos, sketches, or custom illustrations makes the invitation more intimate. Even subtle watercolors or hand-drawn elements offer a bespoke quality to the finished product. These artistic touches ensure that every invitation is a reflection of your personal story.
Unique Envelope Designs: The envelope is the first impression guests receive, so give it extra attention. Experiment with envelope liners, seal stamps, or even wax seals to add a layer of anticipation before the invitation is opened. Customizing the envelope helps set the stage for the entire celebration and gives guests a sneak peek into your creative vision.
Essential Tools and Materials for DIY Invitations
Investing in the right tools can make a significant difference in your DIY projects. A well-stocked toolkit not only improves the quality of your work but also smooths the way for your creative process. Below is a list of some tools and materials that can prove really useful:
High-Quality Printer: A good printer will ensure that your invitation designs are crisp and clear, a must when incorporating detailed imagery or fonts.
Paper Cutter or Scissors: For precise cuts, a paper cutter can be far more effective than scissors. Accuracy is key when maintaining uniformity across invitations.
Adhesives and Tape: Reliable adhesives—whether glue sticks or double-sided tape—help bind various materials together. They are essential when working with layered designs.
Embellishments: Ribbons, lace, or even dried flowers serve as beautiful finishing touches. Such details can really add to the overall allure of your invitation.
Stamps and Ink Pads: Adding stamps creates an artistic, often vintage or whimsical feel, enhancing the overall design with a personal stamp of creativity.
Software for Design: If you lean towards a digital approach before embracing traditional crafting, tools like Canva or Adobe Spark offer plenty of customizable templates to get you started.
Using these tools ensures that every detail of your DIY invitations looks polished. The more refined your tools, the easier it is to experiment and create something that truly reflects your wedding’s personality.
Frequently Asked Questions
This section addresses common questions that come up when creating unique DIY wedding invitations.
Question: How do I choose the right style for my wedding invitation?
Answer: Consider your wedding theme, venue, and personal taste. If your wedding is informal and relaxed, a rustic or boho style might work best. For a more polished event, classic or minimalist designs tend to be a hit. Experiment with different styles until you find one that resonates with your vision.
Question: What if I don’t have advanced crafting skills?
Answer: Many DIY projects allow for creativity at all skill levels. Start simple and choose designs that can easily be scaled as you gain confidence. There are numerous tutorials and guides online that cater to beginners in DIY wedding projects.
Question: Can these ideas be adapted for small or large weddings?
Answer: Absolutely. The techniques and ideas presented are versatile enough to be tailored for any wedding size. Customizing your design to fit the tone and scale of your wedding is completely manageable with a bit of thoughtful planning.
Question: How can I save money while still producing high-quality invitations?
Answer: DIY projects help cut costs by reducing the need for professional services. By sourcing budget-friendly materials, reusing items you already have, and investing time to learn new techniques, you can produce beautiful invitations without overspending.
Additional Inspiration and Resources for DIY Creators
There is a wealth of ideas and resources available to help boost your creative projects. When you feel stuck or in need of fresh inspiration, consider exploring online DIY forums, blogs, and video tutorials. Many creative communities share their successes and setbacks alike, offering insights and practical advice that can make your journey smoother. Reading about others’ experiences can also help you fine-tune your own process and spark ideas you may not have considered.
In addition, look for local workshops or craft classes that teach specific techniques. These sessions provide hands-on guidance and a chance to meet other creative individuals who are just as passionate about personalizing their wedding details. Sometimes a small change—like switching up your tools or trying a new material—can make a huge difference in your final design. Give yourself permission to experiment and remember that every creation is a stepping stone to the next-level cool wedding experience you envision.
Many of these resources are free or low-cost, making it easy for you to jump into new methods without a big investment. Your creative journey is all about exploring what works best for you, so take your time, absorb different perspectives, and let your imagination run wild.
Wrapping Up Your DIY Wedding Invitation Journey
Crafting your own wedding invitations allows you to infuse each card with a deep personal flair. Every decision—from choosing innovative materials to working through creative challenges—adds up to an invitation that truly reflects the spirit of your celebration. Whether you are a seasoned crafter or a beginner eager to experiment, the process of designing something on your own is incredibly rewarding.
Remember that planning and practice go a long way. There are plenty of resources available online and in local craft stores to help smooth the way, and every trial offers a lesson for next time. For anyone busy planning their big day, I encourage you to check out my detailed wedding planning guide at www.weddingdayplan.com. This guide is filled with ideas and tips to help make sure everything in your wedding turns out just right.
Your DIY wedding invitations are not just pieces of paper. They set the stage for the celebration and vividly tell the story of your love. Start with a clear vision, gather your supplies, and let your creativity flow freely. Happy crafting and best wishes for your special day!
